How to Replace Photo Background? - 3 Different Ways
The background of a photo plays a crucial role in shaping the overall impression. An unsuccessful image could result from a messy room that distracts from the main subject or a lackluster landscape that fails to convey the desired mood. Swapping out the background of a photo can significantly boost its visual impact and add a unique touch, elevating your photos to a new level. In this article, we will discuss three practical methods to smoothly change photo backgrounds, empowering you to express your creativity and enhance your images with ease.

Method 1: Manual Replace Photo Background - Photoshop
Adobe Photoshop is a popular and robust software extensively utilized for editing and altering photos, including the task of replacing backgrounds. Renowned for its advanced selection tools, optimization features, and layer masking functionalities, Adobe Photoshop is the preferred choice for professionals in photography and graphic design.
Step 1: Choose a Selection Tool and Select Subject
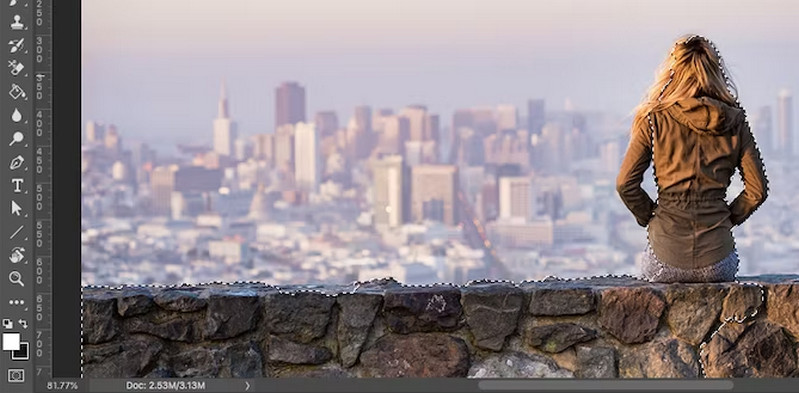
Use the "Quick Selection" tool to select just the shape of the model. Then You can find the "Select Subject" option located at the top of the window next to the Select and Mask tool, which is utilized for refining selections.
Step 2:Fine-Tune Your Selection
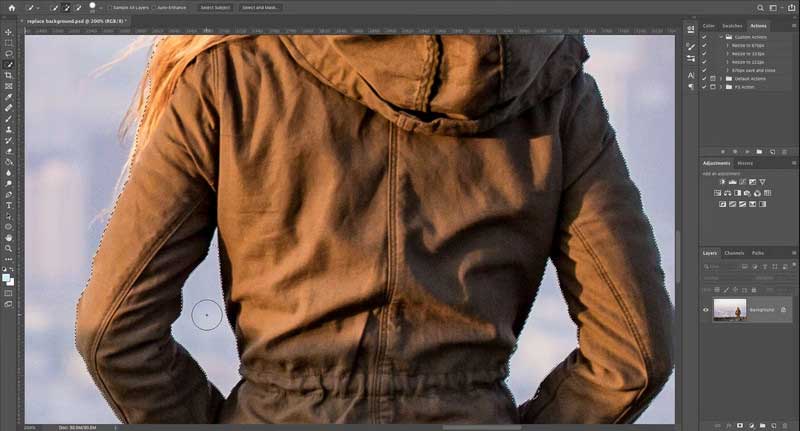
Zoom in and use tools like "Refine Edge" to clean up the selection around hair or complex edges. If you need to remove anything from the selection, hold down the "Alt" key and click and drag in those areas.
Step 3:Select and Mask
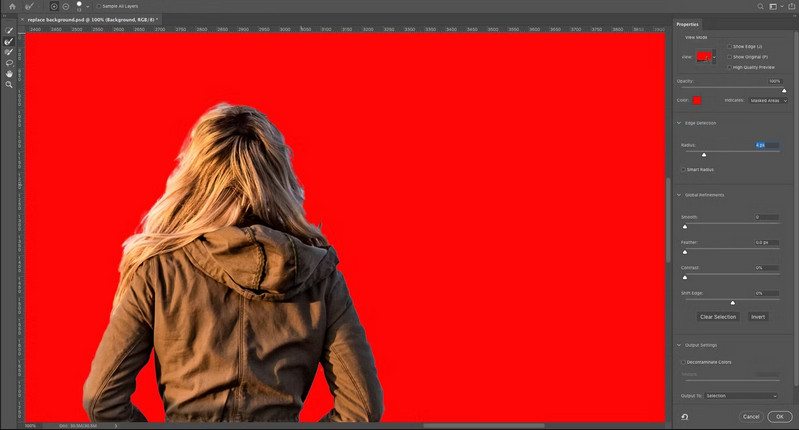
Click on the "Select and Mask" option in the top toolbar. This will open a window where you can fine-tune your selection and transform it into a mask. Within the Properties panel, select the "View Mode" option to adjust how your selection is displayed.
Step 4:Adjust the Settings
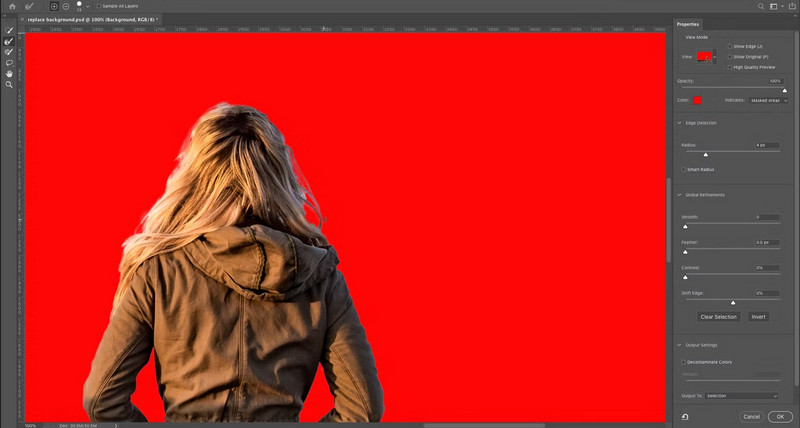
Global refinement is an option in selections and masks. Here you can smooth the edges of the selection, add feathers to soften the edges of the selection, and increase the contrast of edge pixels to harden the edges of the selection to adjust the entire image.
Step 5:Remove the Background
After finalizing your selection, go to the output settings and choose "Purge Color" to eliminate any color fringing. Then, select "New Layer with Layer Mask" and click "OK". This action adds your selection as a new layer on the main image, allowing you to replace the background.
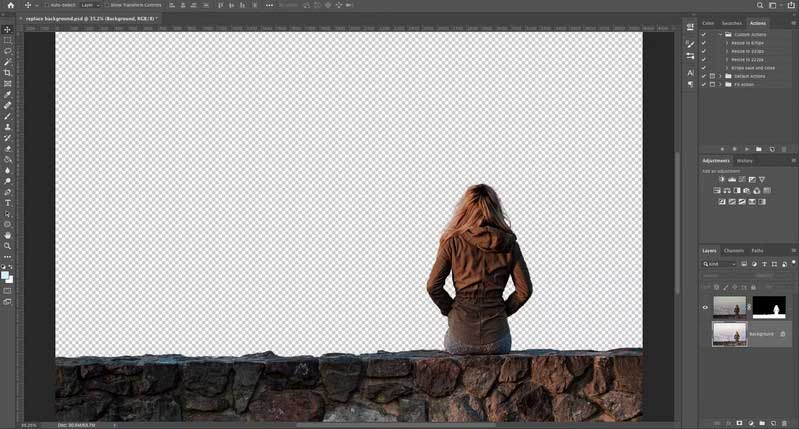
Step 6:Replace a New Background and Adjust Color
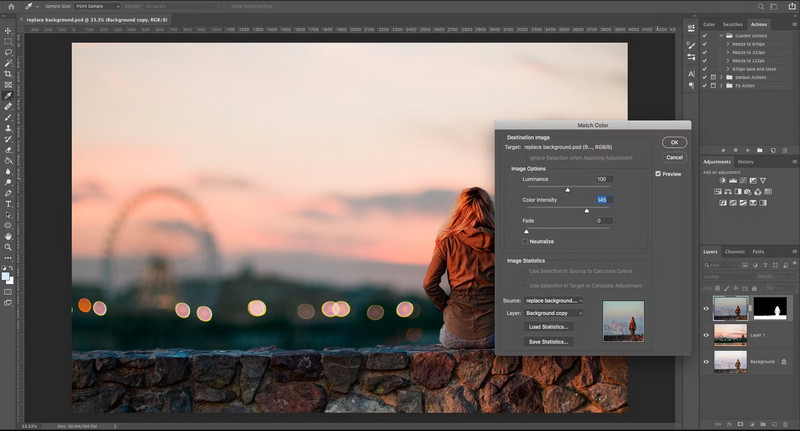
Paste the new background below the foreground layer. Select the foreground image (not the mask) and go to Image > Adjustments > Match Color. Choose the working image as the source, then select the layer to adjust. Use the Neutralize option to remove color casts and fine-tune brightness and intensity for a seamless blend between the foreground and background.
Method 2: Automatically Replace Photo Background Use AI Photo Editing Tools - AVCLabs PhotoPro AI
While Photoshop offers powerful background replacement capabilities, it requires some manual effort and expertise. Thankfully, advancements in AI technology have paved the way for user-friendly tools like AVCLabs PhotoPro AI.
AVCLabs PhotoPro AI offers a range of features that leverage artificial intelligence to perform tasks such as object removal, background replacement, facial restoration, photo enhancement, color calibration, and converting black and white photos to color. This software is designed to reduce the manually intensive workload of photo editing, thereby increasing creativity and productivity.
Key Features of AVCLabs PhotoPro AI
- Advanced AI algorithms for automatic background detection and removal
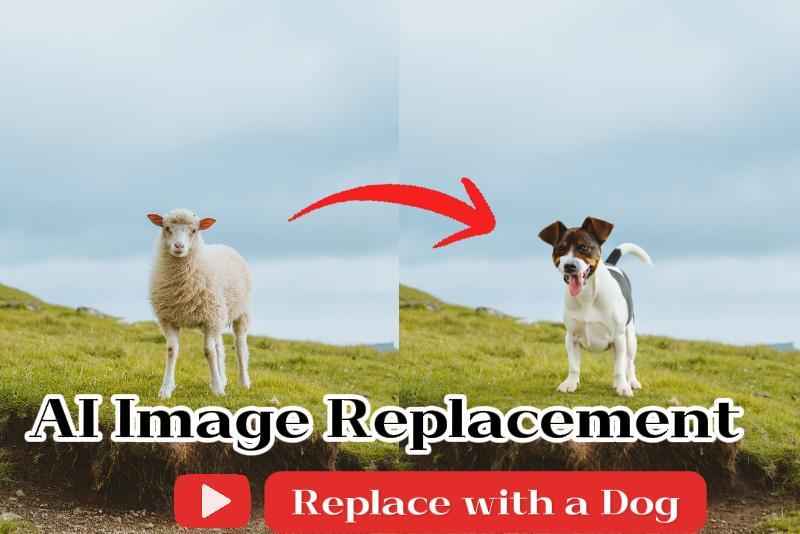
- Automatically detect and replace any part of the image with new AI-generated objects.
- Increase image resolution by 2x, 3x, 4x without losing quality
- Colorize B&W photos to make it come to life again
- Advanced AI algorithms for automatic background detection and removal
- Automatically optimizes photo quality and clarity using AI algorithms
How to Use AVCLabs PhotoPro AI to Replace Photo Background? (2 Different Methods)
Step 1: Download and Install
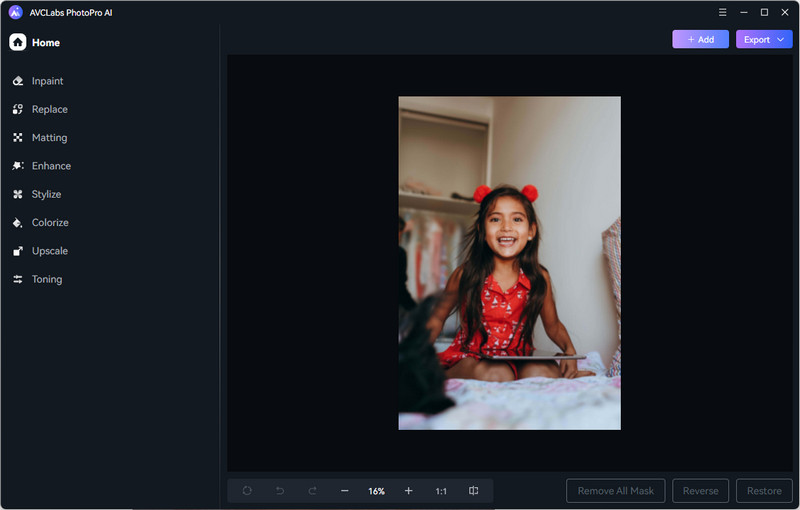
Begin by downloading and installing AVCLabs PhotoPro AI on your computer. Then launch the software and familiarize yourself with its user-friendly interface.

Step 2: Import Image to the Program
Import the image that you want to replace background into AVCLabs PhotoPro AI. You can choose to import photos from your folder or drag the photo directly into the program.
Method 1: Using AI Replace to Change Photo Background
Step 3: Select Photo Background
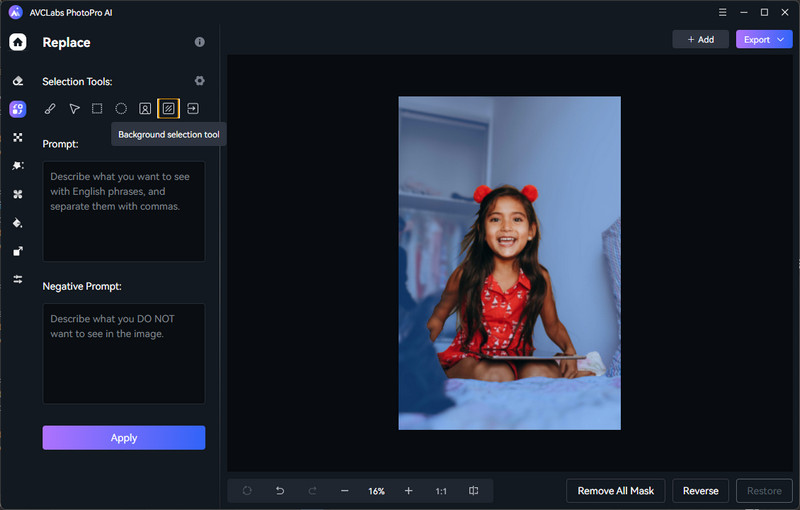
Just locate the "Replace" tool on the left menu bar. Use the background selection tools to precisely choose the background you want to replace in your image.
Step 4: Enter Text Prompt
Enter a text prompt describing the new background you want to insert into the image. Be as detailed as possible for a more accurate replacement.
Pro Tip: You can also use negative prompts to specify what you don't want in the replacement.
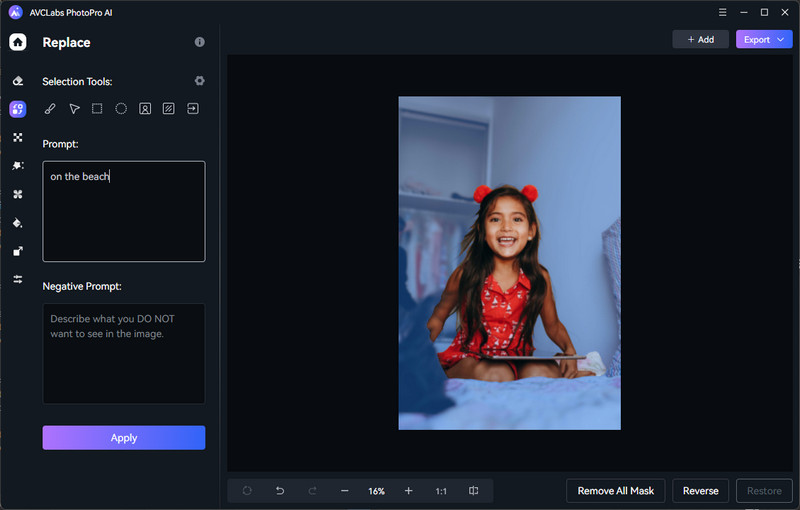
Step 5: Preview Photo with Background Replaced
Click "Apply" and the program will generate a new background photo based on your text prompt. If you're satisfied with the result, you can click "Export" to save the final image with the replaced background.

Method 2: Using AI Matting to Change Photo Background
Step 3: Select Photo Background
Click the "Matting" option and there are six selection tools. If the image has a clear distinction between the foreground and background, then the Background and Foreground selection tool is the ideal choice. Click the Foreground Selection tool, and it will automatically identify and cover the foreground objects.
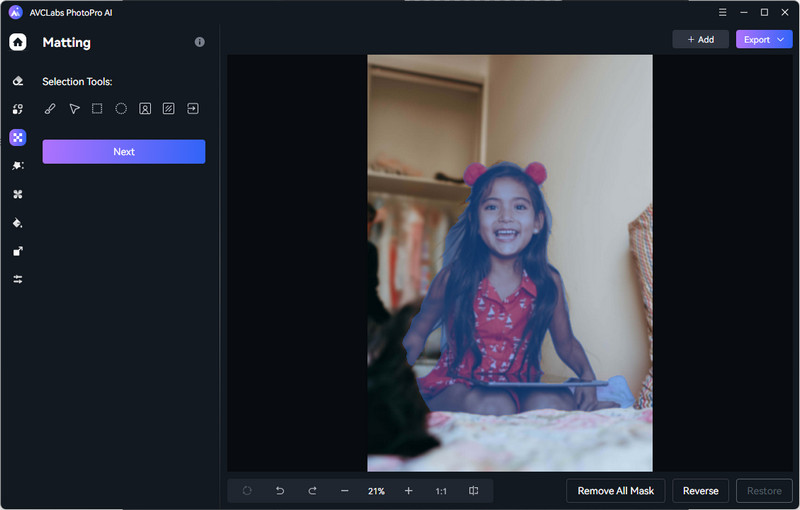
Step 4: Enter Text Prompt
Once you've made your selection, click the Next and the Apply button. This action will remove the background, leaving it transparent by default.
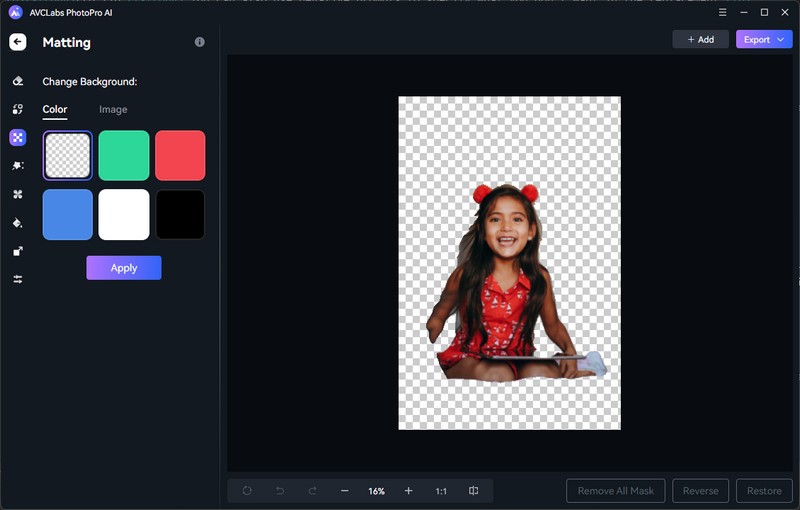
Step 5: Replace with a New Background
To replace the photo background with your own image, click the Image button and specify a new photo as the background.
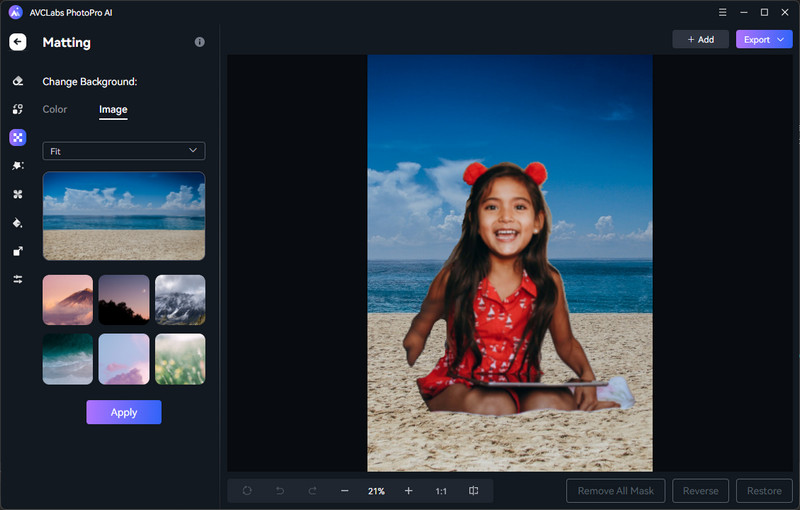
Method 3: Replace Photo Background Online - Adobe Firefly
While the previous methods offer more control, there are situations where you might need a quick and easy background replacement without installing any software. Here's where online background removal tools come in.
Adobe Firefly is a set of generative AI tools developed by Adobe to enhance the creative process of artists and designers. It is part of Adobe Creative Cloud and offers a variety of features that allow users to create or replace images using simple text prompts. Adobe Firefly includes a feature called Generate Fill that allows users to easily replace or remove the background from an image.
Step 1:
Search https://firefly.adobe.com/ and enter the Adobe Firefly website.

Step 2:
Choose the Generative Fill function to upload an image, or select a sample asset from the Firefly gallery.

Step 3:
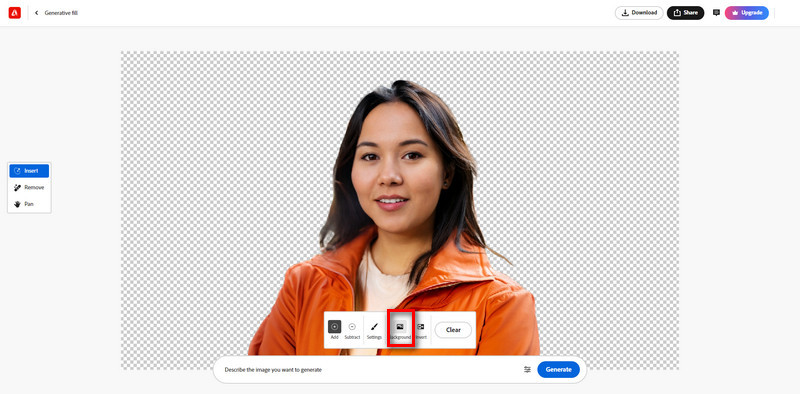
Select the background option located below the image, and it will automatically remove the background of the image.
Step 4:
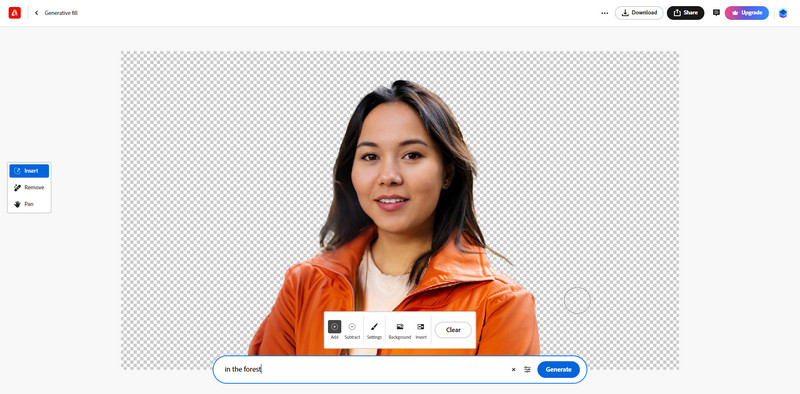
Next, enter a description for the replacement background in the provided dialog box and click "Generate".
Step 5:
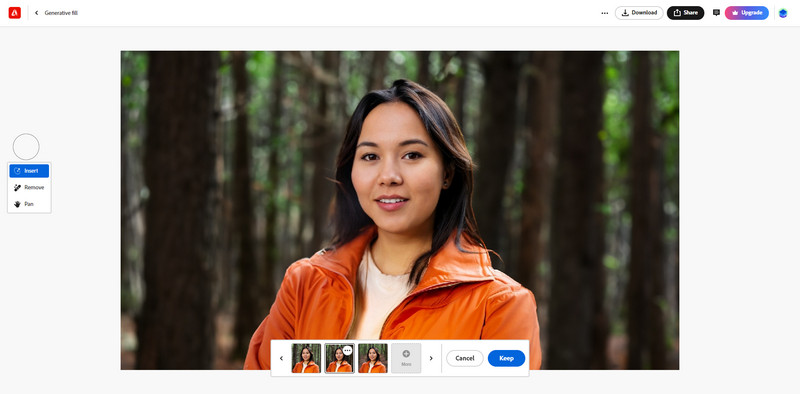
Three replacement background images will be created based on your description. Simply select the one that you find most suitable and save it.
Conclusion
In conclusion, replacing the background of a photo can transform an ordinary image into a captivating one. Whether you're a professional or an amateur, the methods described offer a range of options to suit your needs:

