Welcome to AVCLabs Video Enhancer AI User Guide
AVCLabs Video Enhancer AI is a leading video enhancement and blurring integrated video editing software. This software, based on AI technology, provides video enhancement, video blur, video stabilization and other functions.
Video Enhancement: Improve video quality, upscale video resolution to 4K/8K, optimize facial details, reduce noise, fix blurry and old video, and colorize black and white videos.
Video Blur: Provide 5 tools: Blur Faces, Blur Fixed Objects, Blur Background, Blur License Plates, Track and Blur Objects to help you blur areas in the video, aiming to help you effectively protect the privacy in the video.
Video Stabilization: Reduce shake and instability in videos for a smoother video.
Before you begin
Prepare your video footage: AVCLabs Video Enhancer AI supports a variety of file formats, including 3G2, 3GP, AVI, DIVX, FLV, F4V, M2TS, MTS, MOV, MP4, M4V, MPEG, MPG, DAT, MKV, OGM, RMVB, RM, TS, TP, VOB, WMV, WTV, ASF, DV, WEBM, etc.
Check the system requirements: AVCLAVCLabs Video Enhancer AI is an AI-based software. To ensure the best performance, please make sure your machine has a dedicated GPU for Windows and M1 Chip for Mac. If your computer meets system and hardware requirements, go ahead and install AVCLabs Video Enhancer AI. If your computer has no dedicated GPU or M1 Chip, AVCLabs Video Enhancer AI works but takes longer time to process your video project.
So before starting, check and update your machine to get the best out of AVCLabs Video Enhancer AI.
Tutorial: How to Use AVCLabs Video Enhancer AI to Enhance Video Quality
Download and Install
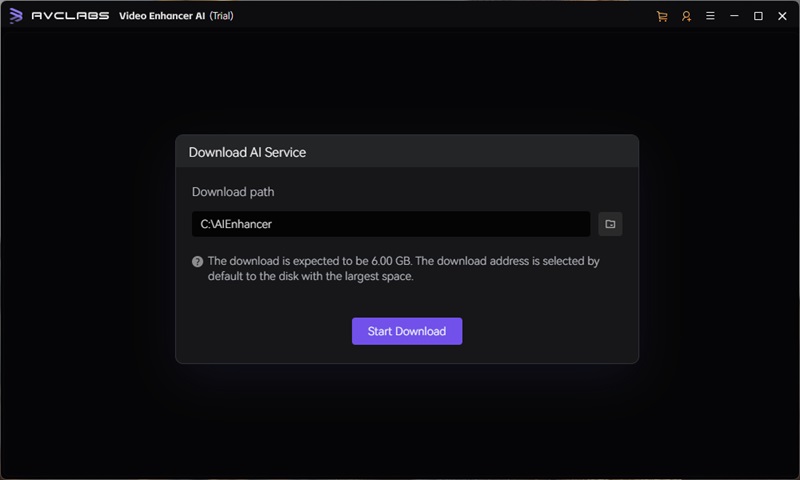
Download and run the installation package of AVCLabs Video Enhancer AI. After installation, the program will download some necessary components according to your system.
Add Videos
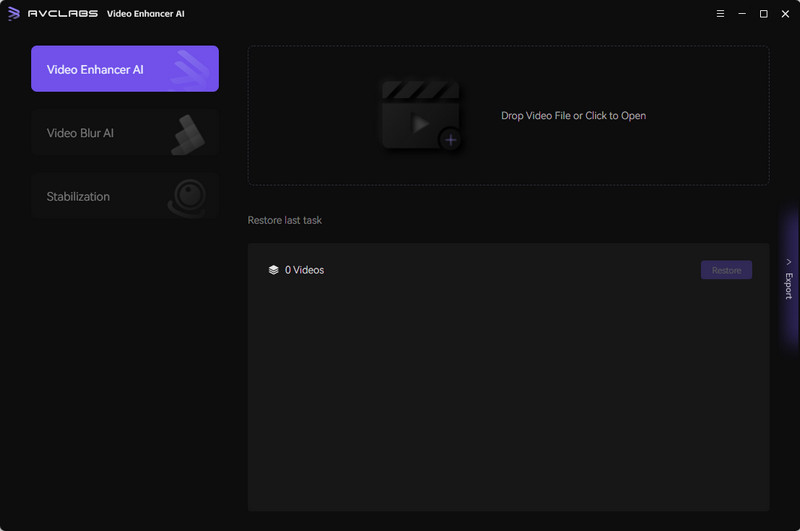
Click the 'Video Enhancer AI' button on the left and add your video. There are 2 ways to add the source video to the program.
You can click the Browse button to import the video file or drag and drop the source video to the program directly. Batch processing is supported, so you can add multiple files.
Select Presets
The Presets include a list of pre-configured options that you can use right away. You can choose one of the ready-made presets or save your current settings as a new preset.
If you select Upscale to 4K and colorize, under the Video menu, we can see the output size of our file will be 3840 x 2160 and the AI Enhancement and the Colorize features have been activated with the Standard model selected.

Customize AI Features
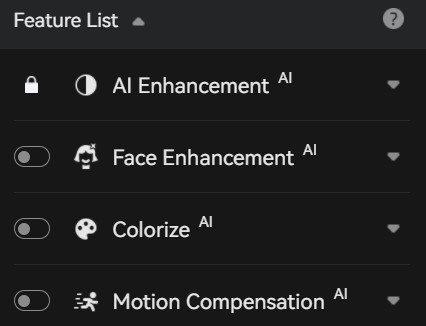
When there is no Preset you want, you can set Presets to None and select the AI features that best suit your needs. There are a choice of 5 AI features: AI Enhancement, Face Enhancement, Colorize, Motion Compensation and SDR to HDR.
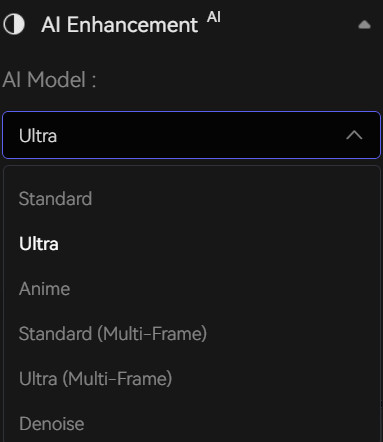
6 models are available under AI Enhancement: Standard, Ultra, Anime, Standard (Multi-Frame), Ultra (Multi-Frame), and Denoise. You can switch between different models for the best enhancement result. If you do not know which model is best for you, please refer to AI Enhancement Models page, where we explained each model in detail.
The models Standard (Multi-Frame) and Ultra (Multi-Frame) are only available for the Windows version.
*Note: Choosing multiple features at the same time, such as AI Enhancement and AI Colorizer, can make the processing speed exceedingly slow. To avoid this, follow the default settings and activate only the necessary features.
Adjust Video Settings
After configuring the AI features, you have the option to adjust the video settings according to your preferences by clicking on the "Video Settings" button. This will allow you to customize aspects such as brightness, saturation, contrast, sharpen, and noise to achieve your desired video output.
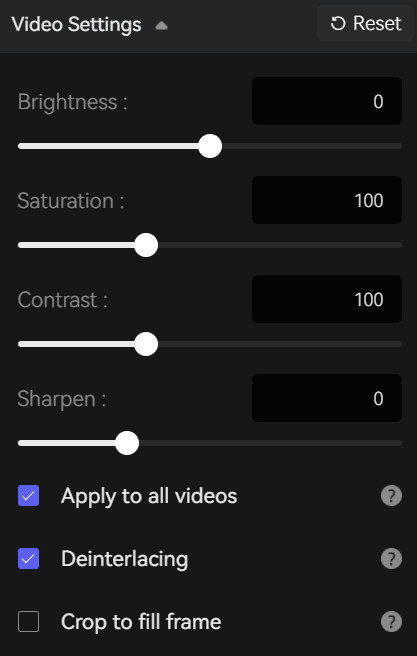
If you need to apply the apply the same video settings to all the videos in a batch, select Apply to all videos. You can use Crop to fill frame to avoid black bars around the edges. Deinterlacing helps to improve the visual quality of a video by removing the interlaced lines.
Specify Output Settings
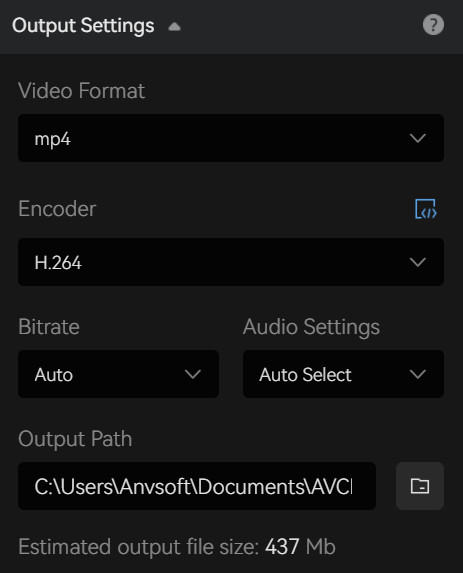
Under Output Settings, you will have the option to specify the Video Format, Encoder, Bitrate, Audio Settings and Output Path. And at the bottom you can also see the estimated file size of the output video after all parameters are set. For more information, refer to Output settings section.
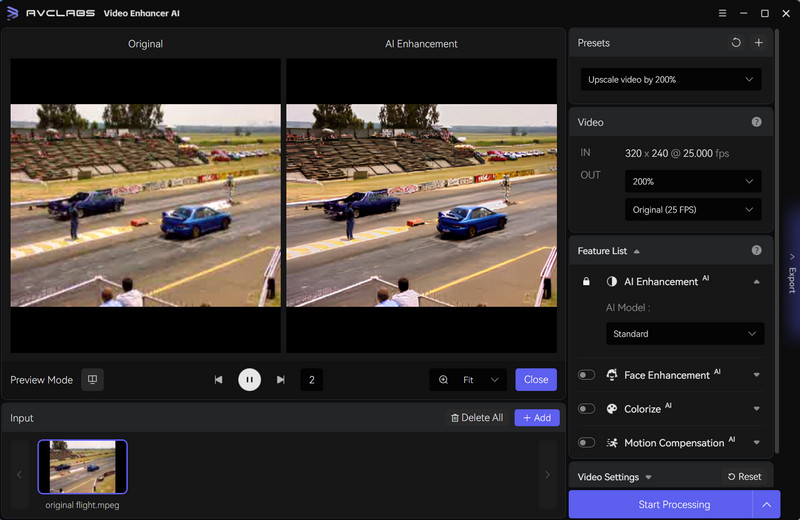
Preview
When all is configured, the Preview feature allows you to have a side-by-side preview for the first 30 frames of your video. You can also determine the start point you want to preview from.
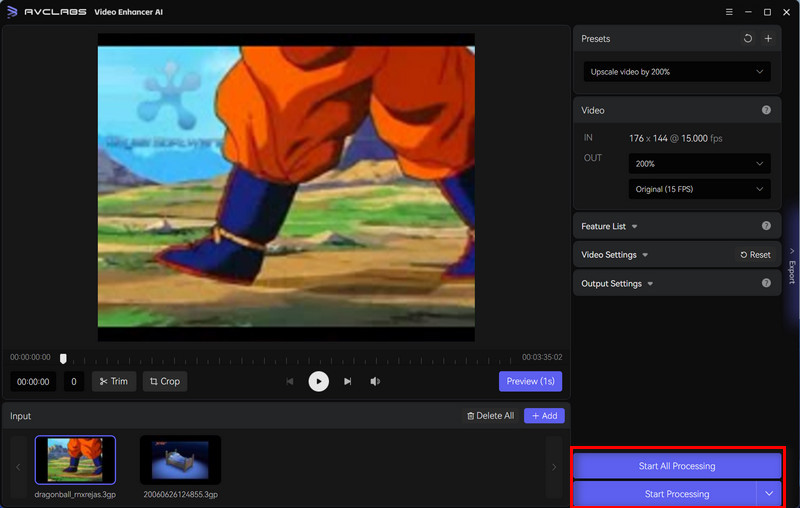
Export Videos
After setting all the parameters, click the Export button to render the video. If you want to use the same output parameter for all added videos, you can click the Export All button to add all videos to the task queue with one click.
During the converting, you can see the original movie and the converted one, which shows the enhancement so clearly. You can continue to add and edit videos by clicking the "Home" button on the left side of the screen to return to the operation screen.
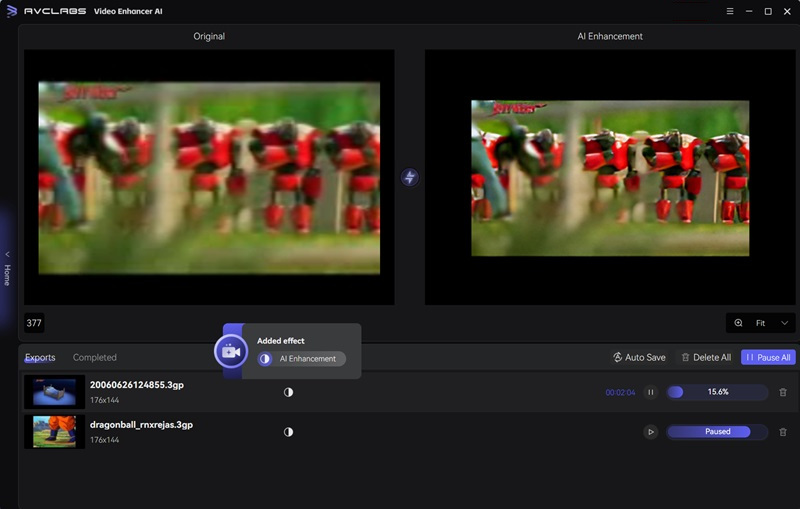
You can also view the processing progress in the Task Queue panel at any time and pause or delete tasks. When it is finished, you can open the file folder and enjoy the final video in a better view.
*Note: To process your video with high efficiency, please make sure your computer has a powerful CPU and Graphics cards (NVIDIA RTX series is recommended).