How to Upscale Video to 1080P, 4K in Premiere Pro
 Posted By: Billie Miller
- Updated On: July 31, 2025
- Category: Video Editing Tips
"Can you upscale 1080p to 4K in Premiere Pro?"
For all video professionals looking to increase the resolution of their videos, upscaling is a must. By increasing video playback quality, it can make your work more visually appealing and help draw in viewers with its improved sharpness and clarity. In this tutorial guide, you'll learn how to upscale video using Adobe Premiere Pro, set custom resolutions for individual clips, understand why upscaling takes time, and find tips for achieving stunning results!
Part 1. How to Upscale Video to 1080P, 4K in Premiere Pro?
Before you begin upscaling, it's important to prepare your footage properly to get the best results. Make sure to stabilize any shaky movements, crop out unwanted elements, and convert your video to a high-bit-rate codec. This minimizes rendering strain during upscaling and preserves as much detail as possible.
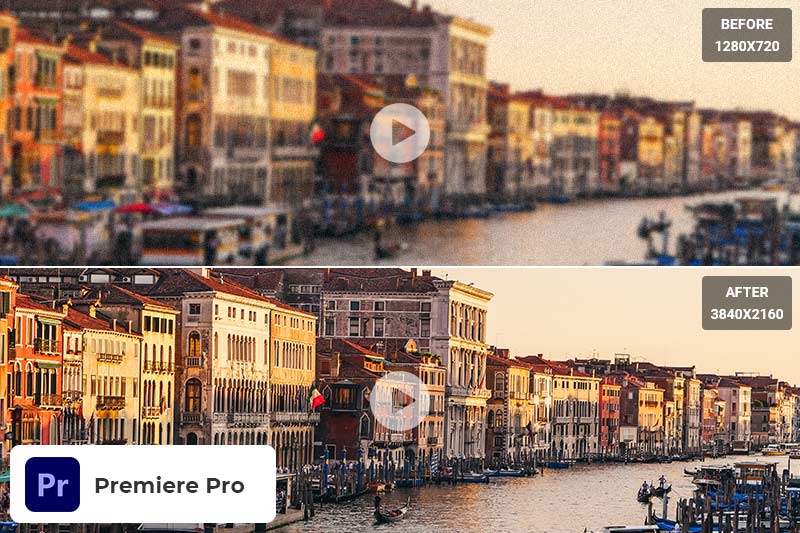
Upscaling video in Premiere Pro is a great way to re-establish the look of old videos and make them appear more cinematic. It involves choosing your target resolution—such as 1080P or 4K—setting up your sequence accordingly, and then scaling the footage to fit. With Premiere Pro's powerful upscaling algorithm and proper preparation, you can enhance video quality with minimal detail loss, transforming basic home videos or low-res clips into an HD visual experience.
Steps on How to Upscale Video in Premiere Pro
Step 1: Add Your Footage in Adobe Premiere
Create a project with intended video resolution for the final output, or open the existing project.
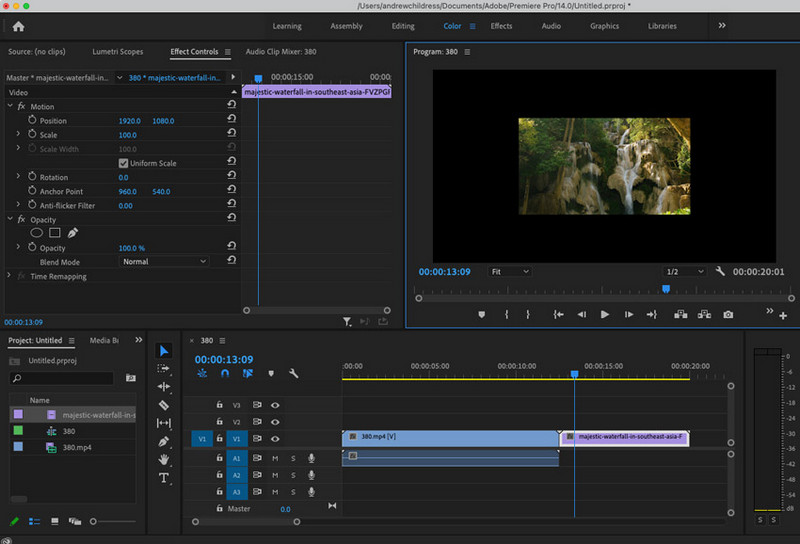
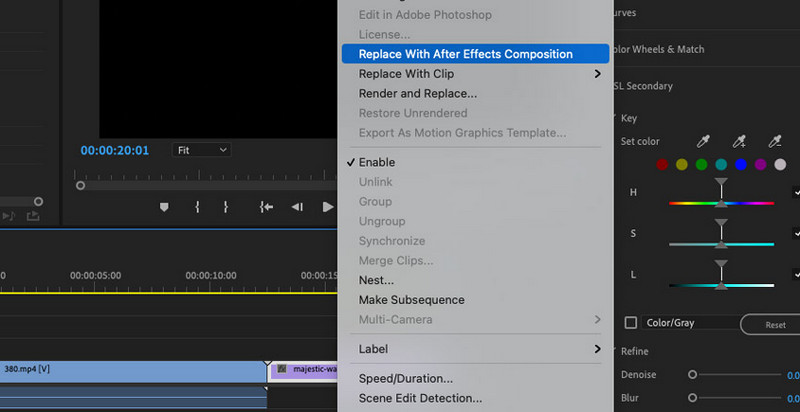
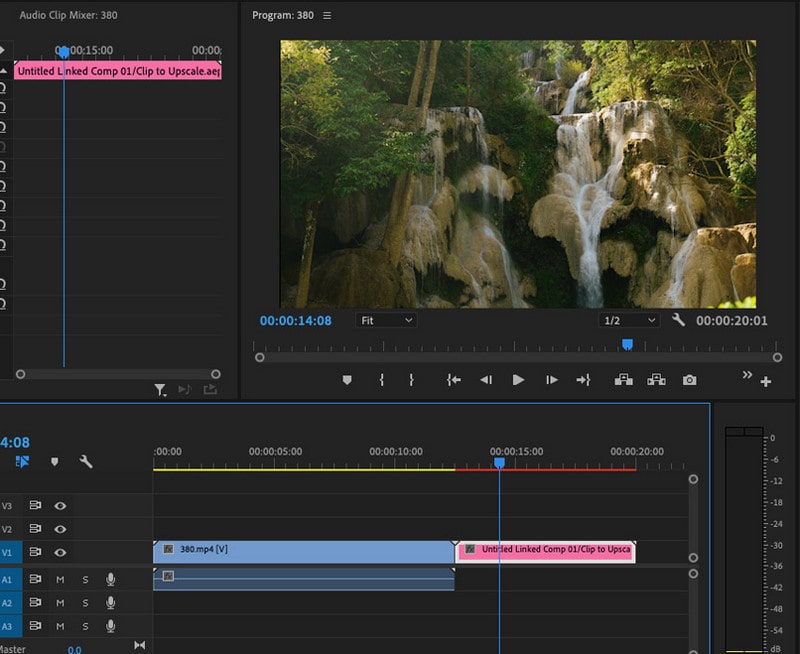
Step 2: Send to After Effects
Right-click on the clip on your timeline and choose Replace With After Effects Composition. This sends the video clip to After Effects to apply our upscale.
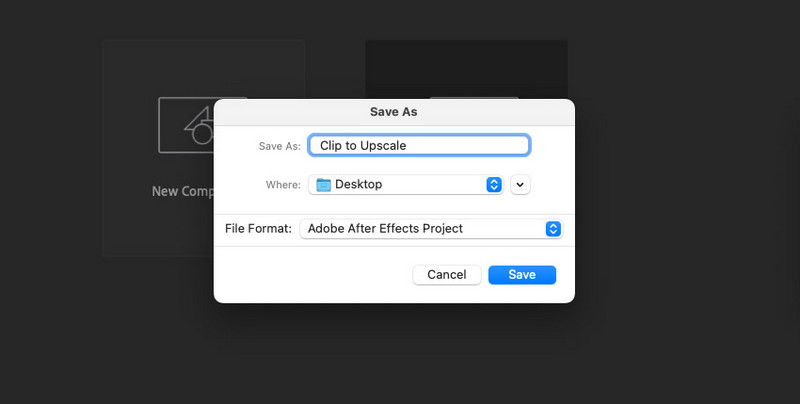
Step 3: Save the After Effects Project
When you are fully done, just click on the Start processing button to convert 480P videos to 1080P online for free.
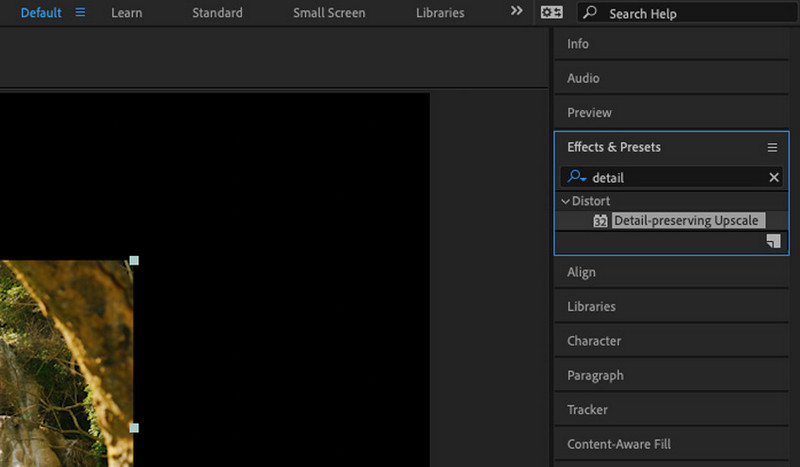
Step 4: Add The Upscaling Effect
In the Effects & Presets panel, search for Detail-preserving Upscale. Double click on it to add it to your active clip.
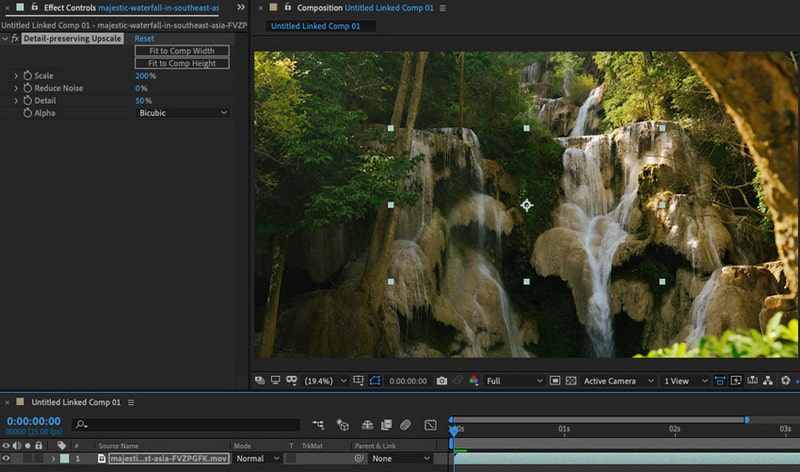
On the Effect Controls panel, click on Fit to Comp Width. This upscales the footage to cover the width of the canvas. You can also tweak the scale amount precisely if you wanted the clip to go even larger.
Try out the Detail slider too. I typically turn this up beyond the default 50% to push the app to keep more detail. It's an art rather an a science, so play with it until you like the look of your footage.
Step 5: Send Back to Premiere
Almost done. Save your After Effects project, then switch back to Premiere. You'll notice that the clip is updated with the modifications we applied in After Effects.
Part 2. Premiere Pro Alternative: Upscale Video to 1080P/4K Without Losing Quality
AVCLabs Video Enhancer AI is an AI-powered upscaling software can help to dramatically upscale videos to higher resolutions, such as 1080P or 4K, without losing quality. This technology takes a low-resolution video and automatically produces a higher resolution version with greater detail and improved clarity.
While it won't improve a scene that was already shot in HD, AI upscaling can be a great option for medium and low-resolution videos, especially ones that have been taken from digital tapes or other legacy formats. By leveraging advanced algorithms and neural networks, this type of software can produce impressive results with minimal time investment, allowing organizations to share content quickly while still maintaining high levels of quality.
Key Features of AVCLabs Video Enhancer AI
- Upscale low-res videos to 1080p, 4K, and 8K
- Remove video noise and restore facial details
- Colorize B&W videos to bring them to life
- Blur all unwanted parts to protect privacy
- Stabilize footage by removing camera shake
How to Upscale Low-resolution Videos from 480p, 720p to 1080p, 4K, 8K?
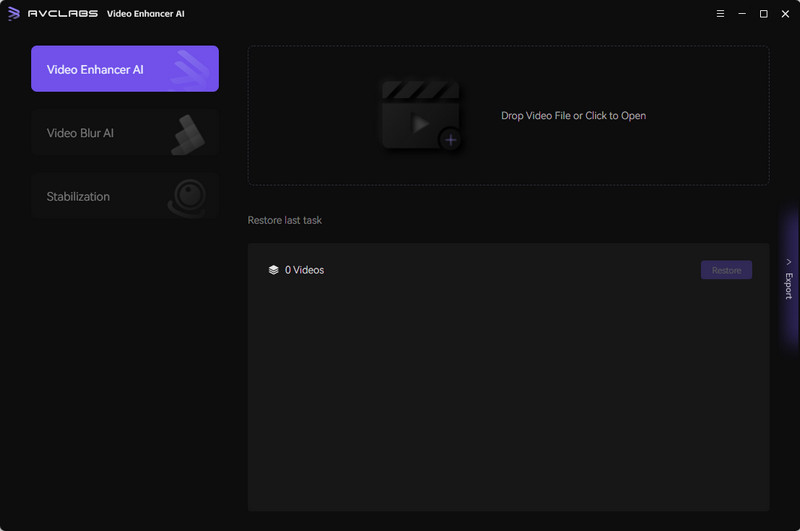
Step 1: Run AVCLabs Video Enhancer AI
Download and install AVCLabs Video Enhancer AI on your computer.
Step 2: Add Your Video
Simply click on the Browse button to add one or multiple videos of low-res videos in 480P, 720P resolution to the program. You can also drag and drop the video file into the program.
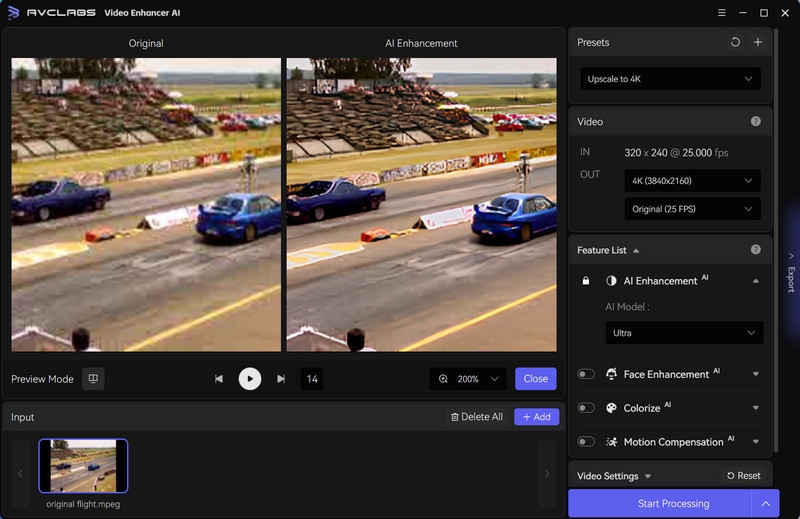
Step 3: Choose AI Upscaling Model
Choose some critical parameters like processing AI model, output resolution, output format and output path, brightness, contrast, and saturation.

Step 4:Upscale Video Resolution
Once all of your prep work is done, simply click on the Start Processing to automatically upscale videos from 480p, 720p to 1080p, 4K, even 8K.
FAQs about Upscaling Video in Premiere Pro
How can I upscale video in Premiere Pro?
To upscale video in Premiere Pro, first, import the video into your project, then right-click on the video in the project panel and select "Set to Frame Size". This will upscale the video to match the sequence settings. If you want to upscale the video further, you can use the "Scale" option in the "Effect Controls" panel.
What is the best way to upscale video in Premiere Pro?
The best way to upscale video in Premiere Pro is to use the "Scale" option in the "Effect Controls" panel. This will allow you to increase the size of the video while maintaining as much quality as possible. It's important to keep in mind that upscaling too much can result in a loss of quality, so it's best to be conservative with the amount of upscaling you do.
Can upscaling improve the quality of my video?
Yes, especially with AI-powered tools. While basic upscaling just enlarges the video, leading to blur, tools like AVCLabs Video Enhancer AI use deep learning to restore details, reduce noise, and sharpen blurry footage. This makes your upscaled video look clearer and more natural—especially when converting from SD to HD or 4K.
What are some best practices for upscaling video in Premiere Pro?
Some best practices for upscaling video in Premiere Pro include being conservative with the amount of upscaling you do, making sure your sequence settings match the resolution of your video, and using the "Scale" option in the "Effect Controls" panel to upscale the video while maintaining as much quality as possible. Additionally, it's important to preview your upscaled video to make sure it looks good before exporting it.
Conclusion
Upscaling video to 1080P or 4K in Premiere Pro is a solid way to boost visual quality—especially when done with the right settings and techniques. For even better results, AI-powered tools like AVCLabs Video Enhancer AI can intelligently enhance and upscale footage without compromising detail. While finding the best method may take some testing, with this guide, you’re now well-equipped to improve your video’s resolution with confidence.