How to Stretch an Image: Ultimate Guide in Photoshop, Canva, and iPhone
Whether you're designing graphics, enhancing photos, or creating visuals for social media, knowing how to stretch photos can make a big difference in achieving the perfect composition. Stretching an image allows you to adjust image proportions, emphasize specific details, or fit it into a desired layout without starting from scratch.
In this guide, we’ll walk you through step-by-step instructions on how to stretch an image using Photoshop, Canva, and your iPhone, making the process straightforward and efficient across different tools and devices.
Part 1: How to Stretch an Image in Photoshop?
Stretching an image in Photoshop is an essential skill for designers, photographers, and content creators. Whether you're adjusting an image to fit a specific layout or creatively altering its proportions, Photoshop offers several tools to make this process simple and effective. You can adjust image proportions depending on your needs.
Method 1: Using the Free Transform Tool in Photoshop to Stretch an Image
Step 1: Open Your Image
Launch Photoshop and open the image you wish to stretch.
Step 2: Select the Layer
In the Layers panel, select the layer containing the image. If it's locked as a background layer, double-click it to convert it into an editable layer.
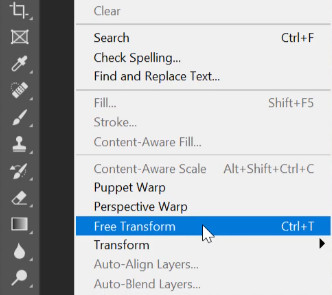
Step 3: Activate Free Transform
To activate the Free Transform tool, go to the Edit menu at the top of the screen and select Free Transform. You can also use the shortcut Ctrl + T (Windows) or Command + T (Mac).
Step 4: Stretch the Image
Click and drag the corner or side handles of the bounding box to stretch image without distortion as desired. To maintain image proportions, hold the Shift key while dragging. For free distortion, drag without holding the Shift key.
Step 5: Apply the Transformation
Press Enter (Windows) or Return (Mac) to finalize the transformation.
Method 2: Using the Image Size Command in Photoshop to Stretch an Image
Step 1: Open Your Image
Launch Photoshop and open the image you wish to stretch.
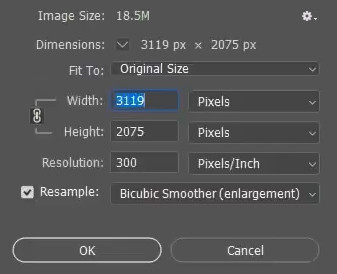
Step 2: Access Image Size
To access the Image Size dialog, click on the Image menu at the top of the screen and select Image Size.
Step 3: Adjust Dimensions
In the Image Size dialog box, uncheck the Constrain Proportions option to adjust the width and height independently. Enter your desired dimensions.
Step 4: Resample the Image
Make sure the Resample option is enabled so Photoshop can add or remove pixels to maintain the image quality during resizing.
Step 5: Apply Changes
Click OK to apply the new dimensions to your image.
Method 3: Using the Canvas Size Command in Photoshop to Stretch an Image
Step 1: Open Your Image
Launch Photoshop and open the image you wish to stretch.
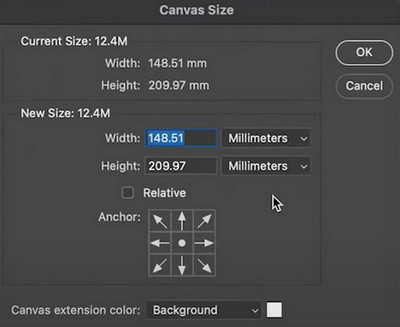
Step 2: Access Canvas Size
To change the canvas size, click on the Image menu at the top of the screen and select Canvas Size.
Step 3: Adjust Canvas Dimensions
In the Canvas Size dialog box, enter the new width and height for the canvas. Use the anchor grid to specify the direction in which the canvas should expand.
Step 4: Apply Changes
Click OK to resize the canvas.
Step 5: Fill the Extended Area
Use the Content-Aware Fill feature or other tools to fill the newly added canvas area with appropriate content, ensuring a seamless extension.
Part 2: How to Stretch an Image in Canva?
Canva offers a quick and intuitive way to stretch images for your designs. If you need to modify an image’s dimensions to better fit your design space, Canva's tools allow you to resize and stretch images without hassle. Here's how to do it:
Step 1: Select the Image
Click on the image within your Canva design to highlight it.
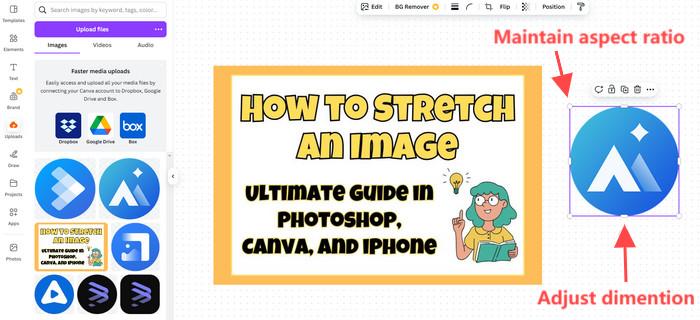
Step 2: Resize Using Corner Handles
Drag the circular handles at the corners to resize image proportionally, maintaining its image proportions.
Step 3: Stretch Using Side Handles
To stretch image horizontally or vertically, drag the rectangular handles located on the sides of the image. This action will adjust image dimensions without preserving the original aspect ratio, potentially causing picture distortion.
Step 4: Crop the Image
If you want to focus on a specific part of the image after stretching, use the crop feature to address any picture distortion. Click on Edit photo above your design, select Crop, adjust the selection as desired, and then click Done to apply the crop.
Part 3: How to Stretch an Image on iPhone?
Stretching an image directly on your iPhone is straightforward with the Photos app. Instead of using complex software, you can easily crop and stretch images with just a few taps. This method allows you to manually adjust the size and aspect ratio, enabling you to reshape the image as desired. Here's how to do it:
Step 1: Open the Photos App
Launch the Photos app and select the image you wish to adjust.
Step 2: Edit the Image
Tap Edit in the top-right corner.
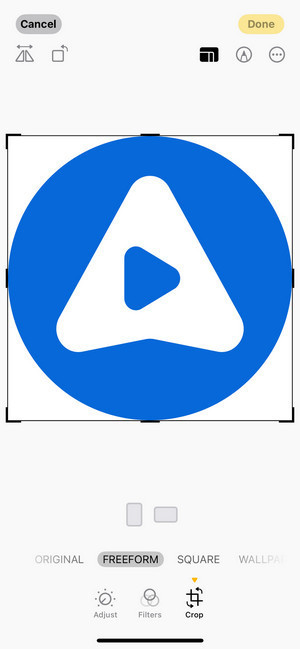
Step 3: Crop the Image
Tap the crop icon at the bottom.
Step 4: Adjust Aspect Ratio
Tap the aspect ratio icon and choose Freeform to manually adjust the image's dimensions by dragging the corners.
Step 5: Save Changes
Once satisfied, tap Done to save the edited image.
Part 4: How to Enhance a Stretched Photo with AI?
When you stretch an image, especially by significantly altering its dimensions, the quality can often be compromised. The image may appear pixelated, blurry, or lose sharpness, which can detract from the overall visual appeal. However, this doesn't have to be the end of the road for your photo. AVCLabs PhotoPro AI offers an advanced solution to restore and enhance stretched photos quality. By leveraging AI-powered technology, PhotoPro AI can repair image details, sharpen blurry areas, and enhance resolution, ensuring your stretched photos still look crisp and professional.
Key Features of AVCLabs PhotoPro AI
- Enhance sharpness and clarity for crisp, high-quality images.
- Remove backgrounds and unwanted objects for a cleaner look.
- Use prompts to replace or inpaint elements for greater customization.
- Upscale images to high resolutions while preserving superior quality.
- Apply artistic filters for unique visual effects and styles.
Step-by-Step Guide to Enhancing Stretched Images with AVCLabs PhotoPro AI
Step 1: Upload Stretched Image
Open AVCLabs PhotoPro AI and upload the low-resolution, stretched image.

Step 2: Enhance Stretched Image Quality
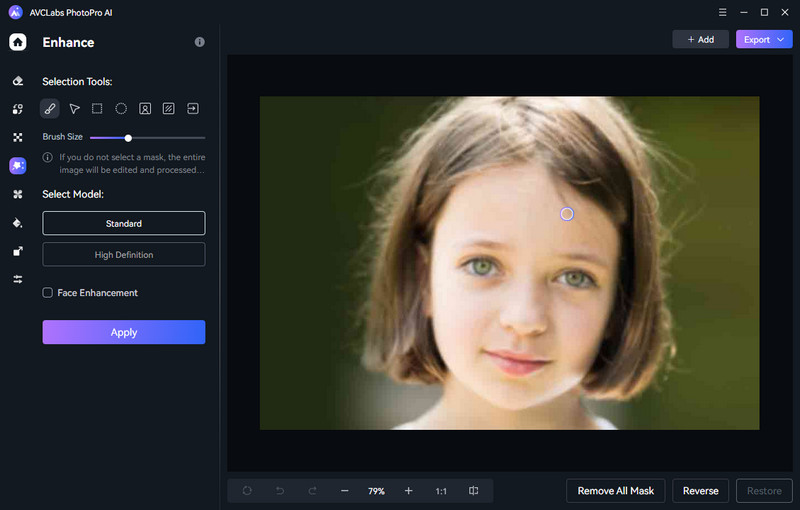
In the left toolbar, select the Enhance option, then use the selection tool to highlight the areas you want to improve. Choose either Standard or High Definition to enhance image quality based on your needs.
Step 3: Preview and Export
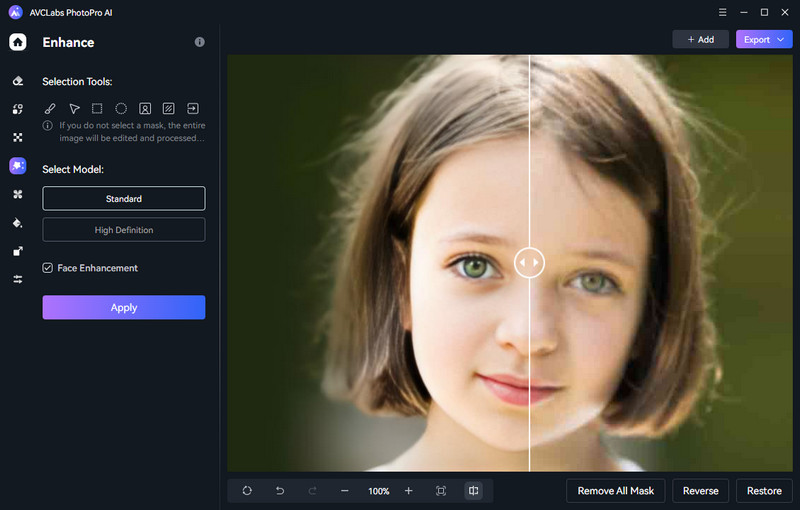
After applying the enhancement, click the Compare button below the image to preview the effect. Use the slider to compare the original and enhanced versions. If you're satisfied with the result, click Export in the top-right corner to save the improved image.
FAQs about How to Stretch an Image
Can I stretch an image without distortion?
Yes, stretching an image without distortion is possible by maintaining the aspect ratio. Here’s how:
1. Hold the Shift key when resizing in Photoshop or Canva.
2. Use tools like AVCLabs PhotoPro AI to enhance stretched images.
What is the best resolution for images to stretch?
For stretching images without losing quality, it's best to start with a resolution of at least 300 DPI (dots per inch) or 2000 pixels on the longest side. Higher resolutions give you more flexibility to stretch the image without significant loss in quality. If you need to improve the resolution after stretching, AVCLabs PhotoPro AI is a great tool to enhance the image quality.
Conclusion
In this guide, we've explored three effective ways to stretch an image: using Photoshop, Canva, and your iPhone. Each tool offers unique ways to adjust image dimensions, making it easy to achieve the desired proportions for any project. However, stretching can impact photo quality, which is where AVCLabs PhotoPro AI comes in. This AI-powered software sharpens and restores stretched images resolution for better quality. For improved quality and clearer results, try using AVCLabs PhotoPro AI to refine your stretched photos today!

