How to Let Your Product Photo Taken With a Smartphone Be Professional
Professional product photography is a game-changer for any brand. It creates an image of professionalism and gives potential customers visual representations of your products. Even if you sell your products on Amazon, eBay, or another online marketplace, professional images can boost sales and attract new customers. If you're thinking about taking photos of your products as a side business or selling them on a marketplace like Amazon, it's important to make sure your product photos are top-notch. These tips will help you get started with perfecting product photos using only a smartphone.
AVCLabs Online Image Upscaler is an online image upscale service that works on upscaling files you provide, to enlarge and/or enhance image quality. Such an online tool is super useful for upscaling the resolution when working with archival/historical pictures, but also with free stock photos that are less sharp, or images that are simply too small for your intended use.
👉️ You may also be interested in: Best AI Video Maker: AI Image to Video Generator Free Online
Part 1: How to Work
Before taking photos, make sure your mobile phone can access memory or track light well enough. Most smartphone cameras these days make great DSLR alternatives for product photography. The higher the megapixel count, the better your product photos will come out. You can use any smartphone with a good camera but aim to get your hands on a newer model with a 12-megapixel camera or more, such as Apple iPhone 8 or newer, Samsung Galaxy S8 or newer, Huawei P20 Pro or newer, Google Pixel 2 or newer.
If you're using an iPhone or Android device that offers access to different camera modes (iSight on iOS11+ Domain via Google Photos), try setting it up for macro shots since this will make items in close proximity look even closer than they actually are! Next, choose how high quality/resolution pictures want their product images to be at—it's best if these settings match what kind of monitor shoppers see them appear upon when shopping online so users know exactly where everything fits into.
Identify the angles you'll use for your shoot
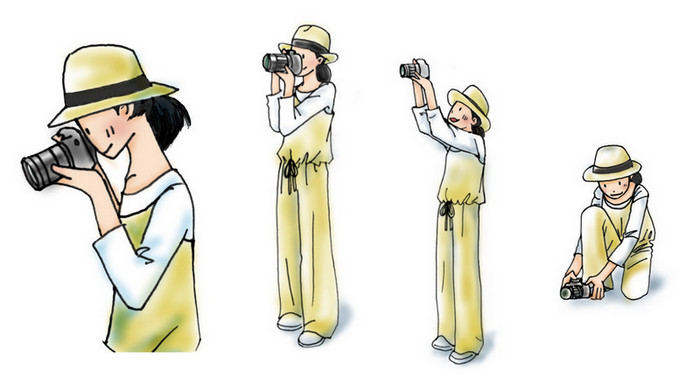
Before you start taking photos, take some time to think about the angles you'll use to shoot your products. Regardless of the product, you're photographing, you'll almost always want to show the product from all sides. If you're shooting clothing or other items that can be rolled or folded, be sure to do this before you take photos. When photographing products in a store, the angle you take is entirely up to you, but when shooting products at home, you'll want to use the same angles that a customer shopping online would see. For horizontal products like t-shirts, consider taking a photo from above. This is a very common angle for product photography and will give customers an idea of what the product looks like from their perspective when wearing it. For other items that don't fit on a tabletop or other surface, you'll want to take photos from an angle that humanizes the product. For example, if you're selling a pair of shoes, you'll want to take photos that make it seem like you're standing in them.
Set up a white backdrop
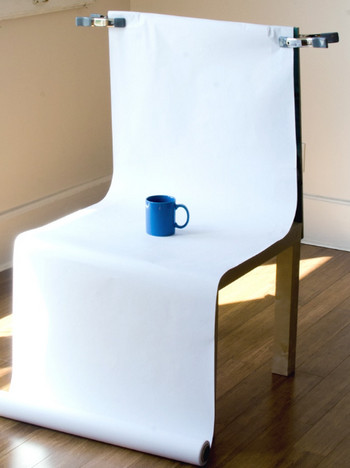
If you want your product photos to look professional, you'll want to set up a white backdrop behind your products. This makes your products pop and draws attention to the product itself rather than any background clutter. You can use a large sheet of cardboard or a wall that's painted white as a makeshift backdrop. Ideally, you'll want to use a backdrop cloth that is specifically designed for product photography. These tend to be a bit more expensive, but they're designed to be wrinkle-free and are a lot easier to set up than a cardboard backdrop. If you're using a backdrop cloth, it's best to iron it before setting it up behind your product. This will get out all the wrinkles and make your photos look a lot cleaner than if you were to use a wrinkled backdrop. You'll want to iron the backdrop from both sides so it doesn't leave an imprint on your photos.
Use natural light instead of relying on your phone's flash
While a flash can be useful in some settings, it's best to use natural light when you can. Natural light is free and will produce much better results than a flash inside. If you're taking product photos outside, the best time is usually around mid-day when the sun is at its highest point in the sky. This is when the sun casts the least amount of shadows. If you're inside, you can use windows to cast light on your product and to your advantage. Make sure you're not photographing your product in front of a window that's casting sunlight directly on it, or you'll get some very strange shadows and a lot of glare.
Use a mini tripod
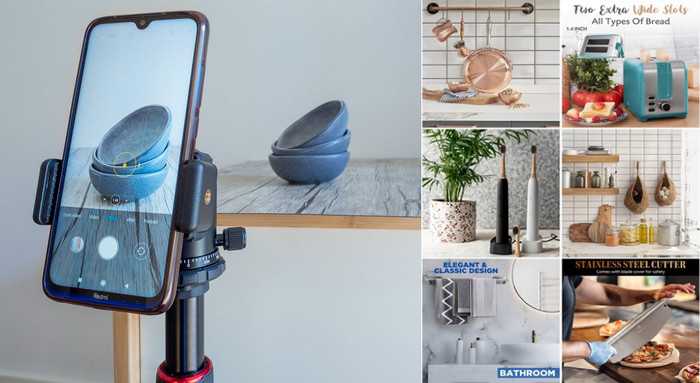
Mini tripods can range from inexpensive to pricey, but the good news is, no matter your budget, they're a good investment with a high payoff. A mini tripod will reduce camera shake and help standardize photo angles and style for your product line.
Part 2: How to shoot photography with a mobile phone
Now that you have all your gear set up and understand the different camera angles and lighting, it's time to shoot some photos. Before you start, use the following checklist to make sure your Android or iPhone camera is ready to shoot.
- Prepare your phone. Make sure your phone is charged and you have backup storage for your images.
- Set up your white balance. To set the white balance according to the light temperature in your setup, touch the WB button, then touch the white background.
- Check your exposure. Tap the circular Exposure button, then touch your product so that the camera knows to expose it.
- Keep everything in focus. Touch the circular Focus button, then touch your product so that the camera knows to properly focus on the product.
- Make sure you lock your camera settings. After you're done adjusting these settings, tap each one again to lock the settings in place. This will stop the camera from automatically adjusting the settings while you are taking shots. Once you lock your settings, you're ready to start shooting!
After your first shot, take a look at your image and see if you think it needs to be brightened or darkened in order to achieve a proper exposure. If you think the exposure needs tweaking, touch the +/- button below the circular Focus button and pull the slider up or down to change the exposure.
Remember to avoid the following three things in order to get the best product shots:
- Zoom feature, as this will reduce image quality.
- Selfie camera, which isn't as good as the back camera.
- Flash, as this will overexpose the photo and mess up the colors.
After you have your shots, it's time to get to photo editing on your phone!
Part 3: Edit and color correct your photos
There are a few editing tools you can use to clean up your photos and make them look as professional as possible. For starters, you'll want to crop your photos to focus on the product. You may also want to use the brightness or contrast tool to adjust the overall brightness and shadows of your photos. If you find that the product you're photographing is blue but the product listing photos are black, you can use the hue tool to correct the color of the product and make it appear black. Most photo editing tools will also have a red/green slider that can be used to correct the color of certain objects. Aside from simple editing, you can also use color correction tools to make your photos look their best. These tools help you adjust the overall color of the photo and can be very useful for correcting the hue of certain products.
Part 4: 6 Best apps for product photography
There are many apps you can use to create professional-looking photos such as Lightroom, Camera+, etc. The most recommended one is AVCLabs Photo Enhancer AI. It is the simplest way for photo improvement with just one click.
1. AVCLabs Photo Enhancer AI
Available for: Windows and Mac OS
Price: Free to try

If you're someone who prefers to edit photos on your computer, you can use AVCLabs Photo Enhancer AI. It is an AI-powered photo enhancer and offers the best photo enhancement for photo improvement such as noise reduction, sharpening, upscaling, bg removal, color calibration, and obtaining high resolution. The whole process is fully automatically processed by AI algorithms. No edit skill or photography experience is required. This tool is recommended strongly because it is no time-costing to learn and just real one click to get the photo enhanced. Free to try and provides a preview for the enhanced photo. Supports importing multiple photos and making adjustments to them at once.
2. Lightroom
Available for: iOS and Android
Price: $9.99 per month
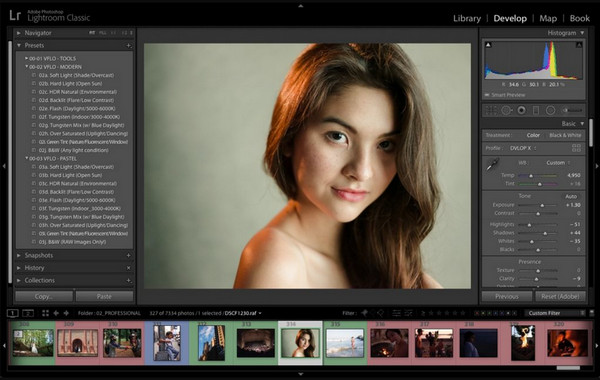
Some would say Adobe Lightroom is the best app for product photography on the market. It features easy-to-use tools like sliders and presets to create photos that look exactly how you want them. Lightroom is also a good option if you plan to edit photos on your computer. You can start on mobile, web, or desktop, and when you make edits, they will be automatically applied across devices.
If you want to get the most out of Lightroom, you can sign up for the Adobe Creative Cloud Photography plan, which includes the photo editing app for desktop, mobile, and web, plus the latest version of Photoshop for $9.99 per month.
3. Adobe Photoshop Express
Available for: iOS, Android, and Windows
Price: Free
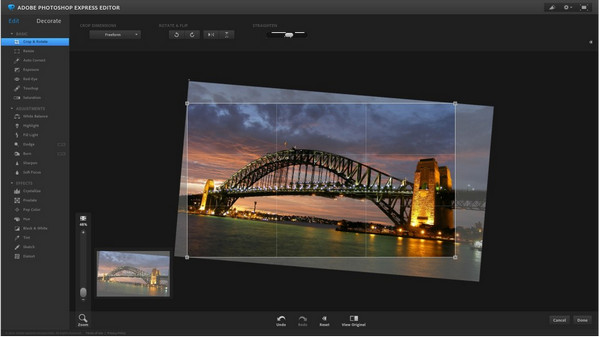
You've probably heard of Adobe Photoshop and what it can do. With Photoshop Express, you get all of its great photo editing features right on your smartphone. You can take product photos from your phone or take them inside the app. Then easily adjust the hue, brightness, exposure, and contrast to create amazing photos for your store.
4. Camera+
Available for: iOS
Price: $2.99
Camera+ is a great option for both experienced and beginner smartphone photographers. You can use Camera+ not only as an editor but also as a camera for your product shoots. The product photography app lets you set exposure and focus and includes a stabilizer, timer, and more so it feels like you're shooting with a high-quality DSLR camera lens.
5. Snapseed
Available for: iOS and Android
Price: Free

Snapseed is a free photography editing software owned by Google. The app brings the power of a professional computer editor to your phone, with many features to edit images in ways you'll usually only find in expensive software. Beginner photographers also have more utility with Snapseed using Stacks, which lets you revert your edits to an earlier version and makes it easy to save settings and apply them.
6. VSCO
Available for: iOS and Android
Price: Free
VSCO has all the basic editing tools such as exposure, contrast, color balance, and more, letting you create incredible photos on the go. It's a great product photo app to enhance images rather than overdo them and doubles as an effective Instagram tool with its huge library of filters and endless options to customize your photos.
If you want to share your product photos on social media, you can use VSCO Grid. VSCO Grid is a publishing platform integrated into the app that lets you share your images on social media and email.
Conclusion
Product photography is an essential aspect of any online store or online marketplace, and it's important that your images stand out as professional. These tips will help you take better photos at home with your smartphone so you can start uploading better images to your online store or marketplace. Remember, if you are not satisfied with the photo and do not want to cost more time editing the photo, just try the AI Photo Enhancer. One click to enhance the photo!

